Getting Started with DataJelly Edge Services
A step-by-step guide to fixing SEO and AI visibility for JavaScript-heavy websites.
Learn more about Edge ServicesBuilt for Lovable, Bolt, and Modern AI Site Builders
DataJelly is designed specifically for JavaScript-first, AI-built websites. No rebuilds, no framework changes — just DNS.
Quick Start Guide
This is the basic process of how to onboard your domain onto DataJelly Edge services (Server Side Rendering). Most domains get through this process in under 30 minutes.
We've tried to make setup as easy as possible. If you run into problems, we love email — reach out here.
→ Using Lovable?
Jump to Lovable Setup
→ Using Cloudflare?
Jump to Cloudflare Setup
→ Vercel / Netlify / Other?
Follow Standard Setup
Standard Setup
If you are hosted on Vercel, Azure, Netlify, or any other standard host, these are the instructions to get your domain onboarded to our Edge services.
Head over to dashboard.datajelly.com and create an account
Click "Add Domain" to start the onboarding process
Verify domain ownership with a TXT DNS record (DNS change)
Update your domain DNS entries to point at DataJelly (DNS change)
Complete the onboarding process
Done! 🎉
Setup Walkthrough
Follow along with screenshots from the actual onboarding flow. Click any image to enlarge.
Step 1 of 4
Create your account
Create your account at dashboard.datajelly.com
Lovable Setup
We host lots of Lovable domains on DataJelly and the setup is very simple. Here are the basics:
Follow the Standard Setup instructions above.
Important: Remove the custom domain from Lovable
After you move your DNS to point at DataJelly, you must remove the custom domain from Lovable. On Lovable, you should only have the .lovable.app entry.
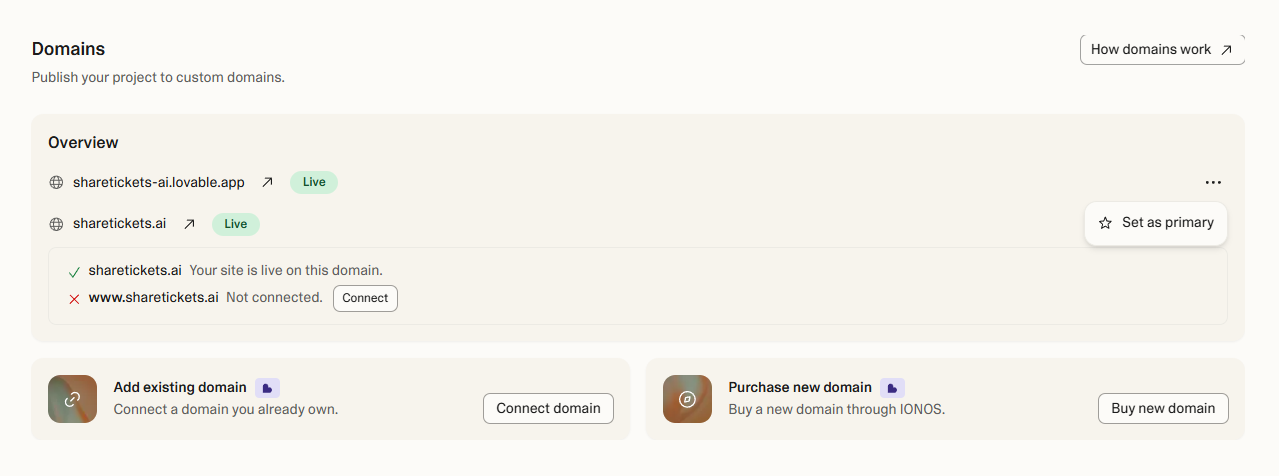
Do NOT add the custom domain back to Lovable
DataJelly now handles your custom domain. If you add the custom domain back to Lovable, you will break DataJelly routing.
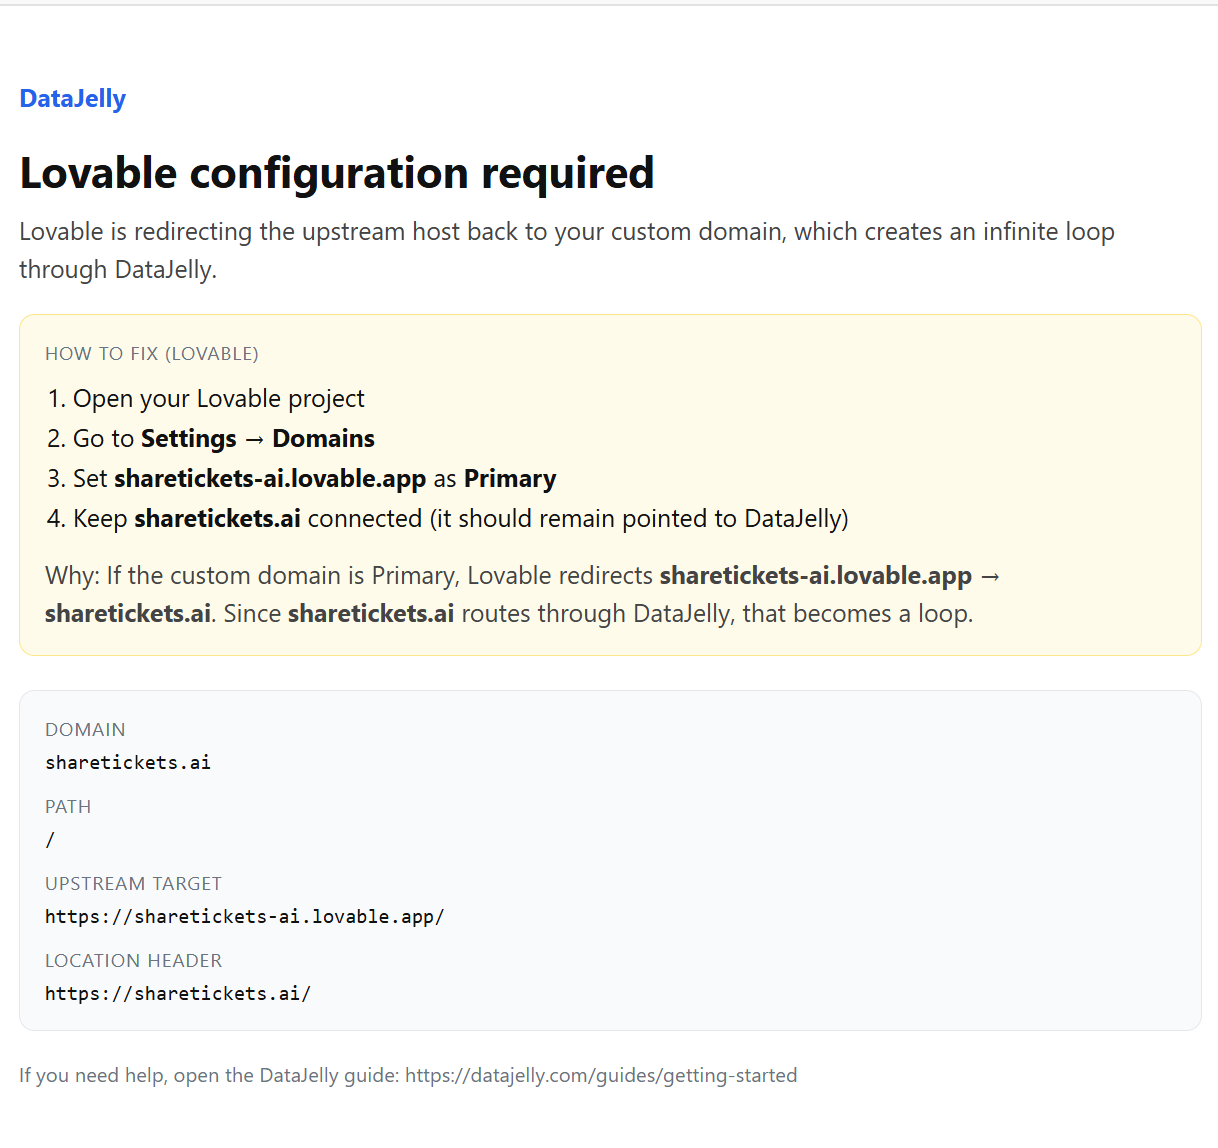
This is what happens if the custom domain is added back to Lovable.
Still having issues? Contact our support team — we'll help you get set up.
Cloudflare Setup
If you are hosting your website on Cloudflare, there are 2 extra steps you need to complete:
Follow the basic setup instructions above.
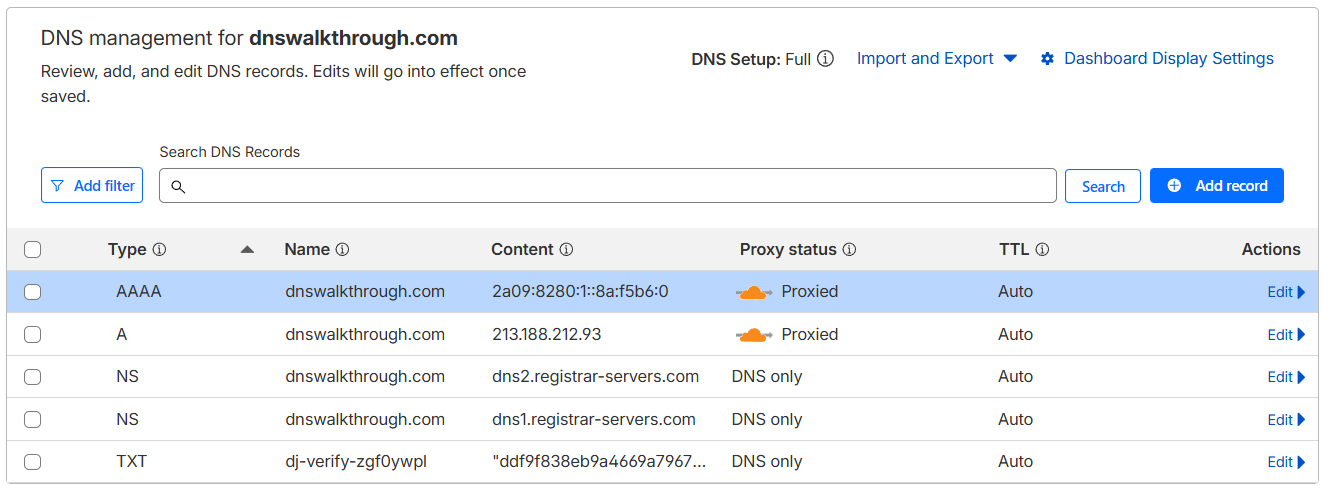
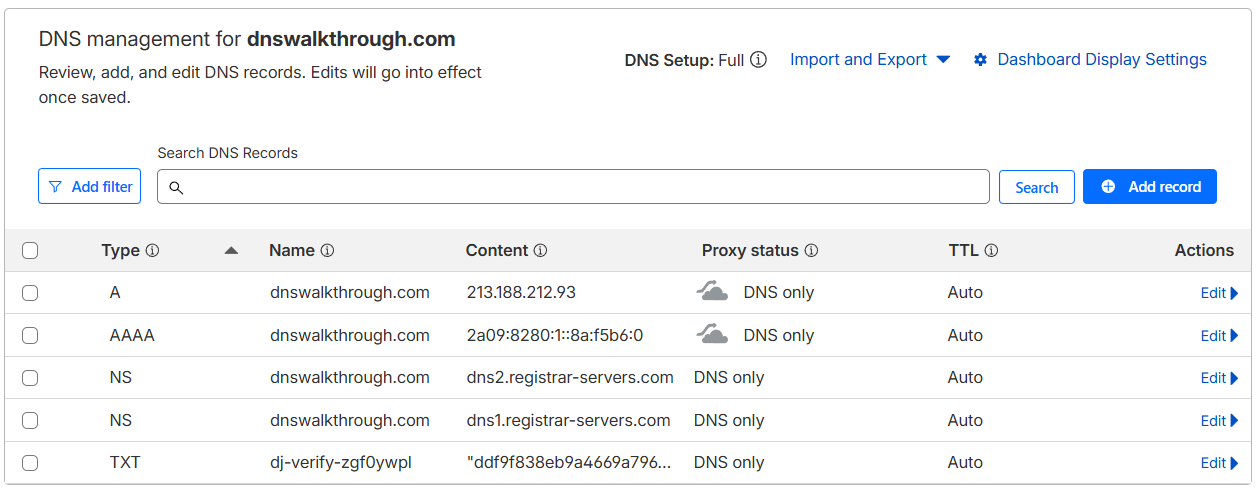
Important: Disable the Cloudflare CDN Proxy
The orange CDN icon needs to be grey, which means DNS Only mode. Click the orange cloud icon to toggle it off.
Before (Proxied — causes issues)
After (DNS Only — correct)
Important: Review Cloudflare Workers
Ensure there are no extra Workers or Page Rules running that can affect routing. These can interfere with DataJelly's edge proxy.
Still having issues? Contact our support team — we'll help you get set up.
How to Verify It's Working
Dashboard Status
Your domain should show:
- DNS: Verified
- SSL: Active
- Snapshots: Generated
Visibility Test
Run the built-in Visibility Test to see exactly what Googlebot, ChatGPT, and other crawlers see on your site.
Run the Visibility Test